Skip to content

Introduction to Building a Home Lab Router with pfSense
A home lab is an indispensable environment for testing, learning, and refining skills. At the core of any robust home lab lies a reliable router, and pfSense – an open-source firewall/router platform based on FreeBSD – offers enterprise-grade features without enterprise costs. This guide to building a home lab router with pfSense explores the benefits, trade-offs, and step-by-step deployment of pfSense, empowering you to build a secure, high-performance network foundation.
What is pfSense?
pfSense is a free, open-source firewall and router software distribution based on FreeBSD, specifically designed to provide robust network security and routing features for both home and enterprise environments. It is managed entirely through a user-friendly web interface, making it accessible even to those with limited technical expertise, and does not require knowledge of the underlying FreeBSD operating system to configure or maintain. pfSense offers advanced capabilities such as stateful packet inspection, VPN support (including IPsec and OpenVPN), VLAN segmentation, traffic shaping, captive portals, and dynamic DNS, all of which can be expanded further through a built-in package system for additional functionality like intrusion detection and web filtering. Its flexibility allows installation on a wide range of hardware—from old computers and mini-PCs to virtual machines and embedded systems—making it a popular choice for network administrators seeking a powerful, customizable, and secure alternative to off-the-shelf routers.
Benefits and Disadvantages of pfSense
Benefits
- Enterprise Features at Zero Cost
pfSense provides advanced capabilities like stateful packet inspection, VPN support (OpenVPN/IPsec), and intrusion detection (via packages like Snort) – typically found in commercial firewalls costing thousands. - Flexible Deployment Options
Run pfSense on dedicated hardware, virtual machines (Proxmox/VMware), or cloud platforms, adapting to lab scale and complexity. - Modular Customization
Expand functionality with 400+ packages (e.g., pfBlockerNG for DNS filtering, Squid for caching). - VLAN and Network Segmentation
Isolate lab traffic from personal devices, IoT networks, or DMZ zones using VLANs. - Community and Enterprise Support
Active forums (Netgate, Reddit) and optional commercial support.
Disadvantages
- Learning Curve
CLI (Command Line Interface) proficiency is needed for advanced troubleshooting. - Hardware Compatibility
Avoid Realtek NICs (Network Interface Cards); Intel i210/i350 recommended for stability. - Virtualization Complexity
Passthrough NICs or SR-IOV (Single Root I/O Virtualization) required for optimal VM performance. - Power Consumption
Older hardware (e.g., Dell R720) may idle at 80W+ vs. modern mini-PCs (10-15W).
Step-by-Step pfSense Setup
1. Hardware Selection
Choose based on lab size and budget. Our suggestion is the Protectli Vault Pro VP2420-4. Affiliate link below.

- Budget Mini-PC (Protectli Vault VP2420):
- Intel Celeron J6412 (10W TDP)
- 4× Intel i211 Gigabit ports
- 8GB RAM, 120GB SSD
- Cost: $380 | Ideal for labs with ≤20 devices.
2. Installation
- Download the pfSense Community Edition (CE) ISO from pfsense.org.
- Create bootable USB via BalenaEtcher.
- Boot target hardware, select “Quick/Easy Install.”
- Partition disk using ZFS (for data integrity).
3. Initial Configuration
- Assign Interfaces:
vtnet0→ WAN (to modem)vtnet1→ LAN (to lab switch)
- Set IP Addresses:
- WAN: DHCP (from ISP)
- LAN: Static (e.g.,
192.168.1.1/24)
- Web GUI Access:
- Connect to
https://192.168.1.1 - Username:
admin| Password:pfsense(change immediately!).
- Connect to
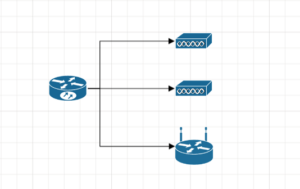
4. VLAN Configuration
Isolate lab traffic:
- Create VLAN:
- VLAN ID: 30
- Parent Interface: LAN
- Description: Lab-Servers
- Assign Interface:
- Interfaces → Assignments → Add new → VLAN30
- DHCP Server:
- Services → DHCP Server → VLAN30
- Range:
192.168.30.50–192.168.30.200
5. Firewall Rules
1. WAN: Block all private IPs (RFC 1918)
2. LAB-SERVERS:
   - Allow ICMP (ping)
   - Allow HTTPS to VLAN10 (Management)
   - Block all other inter-VLAN traffic
3. ANTI-LOCKOUT RULE:
   - Allow TCP from LAN to This Firewall (port 443)
6. VPN Setup (OpenVPN)
- Install
openvpn-client-exportpackage. - Create Certificates:
- System → Cert. Manager → Add CA + Server Cert.
- Configure Server:
- VPN → OpenVPN → Servers → Add
- Protocol: UDP on 1194
- Tunnel Network:
10.0.8.0/24
- Export client configurations for secure remote access.
pfSense Best Practices
1. Security Hardening
- Change Default Credentials: Never retain
admin/pfsensedefault credentials. - Enable 2FA: System → User Manager → Admin → Two-Factor Auth.
- Disable Unused Services: SSH, Telnet, and IPv6 if unused to reduce possible attack vectors.
- Auto-Rule Backups: Diagnostics → Backup/Restore → Schedule daily XML backups.
2. Performance Optimization
- Hardware Offloading:
- Enable under System → Advanced → Networking
- Requires Intel NICs for AES-NI encryption acceleration.
- Traffic Shaping:
- Limit P2P/VoIP bandwidth under Firewall → Traffic Shaper.
- Suricata IDS Tuning:
- Use “Inline Mode” for gigabit throughput; limit to WAN interface.
3. Virtualization Tips
- Proxmox PCI Passthrough:
- Edit
/etc/default/grub: Addintel_iommu=on - Update initramfs:
update-initramfs -u
- Edit
- VM Resource Allocation:
- Reserve 1 vCPU core per 500Mbps throughput.
- Enable “NUMA” for multi-socket hosts.
4. Energy Efficiency
- Low-Power Hardware: Mini-PCs (e.g., Protectli) idle at 6-10W.
- Schedule Reboots: Use cron jobs for off-peak reboots.
- SSD over HDD: Reduces power draw by 50-70%.
5. Troubleshooting Workflow
- Check Interfaces:
Status → Interfaces(look for errors/dropped packets). - Test Rules:
Diagnostics → States(filter by blocked traffic). - VPN Debugging:
Diagnostics → OpenVPN(verify certificate chain).
Conclusion
pfSense transforms home labs into enterprise-grade networking environments, offering unparalleled flexibility, security, and customization. By selecting appropriate hardware, configuring VLANs and firewall rules, and adhering to best practices, IT professionals gain hands-on experience with real-world networking principles. Whether virtualized or running on dedicated hardware, pfSense delivers robust routing, segmentation, and VPN services unmatched by consumer gear.