Skip to content

We are an Auvik affiliate and earn rewards from the links included in the below article. We promote Auvik because we believe it is an excellent product that fits the needs of many network engineers. Affiliate partnerships support RouterFreak and allow us to maintain our content for without charging our readers.
Introduction to Network Topology Maps
In a world of increasingly complicated networks with mesh networks, IPS, and IoT devices, having a clear and accurate network topology map is crucial for efficient management, troubleshooting, and planning. A network topology map provides a visual representation of how devices in a network are interconnected, including both physical and logical connections. This comprehensive guide will walk you through the process of creating network topology maps using various tools and techniques, catering to different network sizes and complexities.
Network topology mapping is essential for several reasons:
- Troubleshooting: Quickly identify the source of network issues.
- Capacity Planning: Visualize network bottlenecks and plan for expansion.
- Security Management: Identify potential vulnerabilities and ensure proper segmentation.
- Compliance: Meet regulatory requirements for network documentation.
- Change Management: Assess the impact of network changes before implementation.
In this article, we’ll explore three different approaches to network topology mapping, ranging from fully automated solutions to manual diagramming techniques. We’ll provide step-by-step tutorials for each method, focusing on popular tools used by networking professionals.
Method 1: Automated Network Discovery and Mapping with Auvik
Auvik is a cloud-based network monitoring and management platform that offers powerful automated network discovery and mapping capabilities. It’s particularly well-suited for managed service providers (MSPs) and enterprise IT teams managing complex, multi-site networks. Check out our Auvik review.
Tools Used:
- Auvik Network Management Software
- SNMP (Simple Network Management Protocol)
- Network devices with management interfaces enabled
Step-by-Step Guide:
Step 1: Deploy Auvik Collectors
- Sign up for an Auvik account and log in to the dashboard.
- Navigate to the “Sites” section and click “Add Site.”
- Choose the deployment method for the Auvik collector:
- Virtual appliance (VMware, Hyper-V)
- Windows installer
- Linux installer
Step 2: Configure Network Discovery
- In the Auvik dashboard, go to “Settings” > “Discovery.”
- Configure SNMP settings:
- Add SNMP community strings (for v1/v2c)
- Configure SNMP v3 credentials if used in your network
Set up other discovery methods:
- WMI/RPC for Windows devices
- SSH for Linux/Unix systems
- VMware vSphere integration (if applicable)
Step 3: Initiate Network Scan
- Return to the main dashboard and select your site.
- Click “Run Discovery” to start the automated network scan.
- Auvik will begin identifying devices, mapping connections, and collecting inventory data.
Step 4: Customize and Analyze the Network Map
- Once discovery is complete, go to the “Map” view in Auvik.
- Use the following features to enhance your network topology map:
- Drag and drop devices to organize the layout
- Group devices by location or function
- Apply filters to focus on specific network segments or device types
- Zoom in/out to adjust the level of detail
Explore device details by clicking on individual nodes in the map.
Step 5: Export and Share
- To export the network map, click the “Export” button in the top-right corner.
- Choose from available export formats:
- PNG image
- SVG vector graphic
- Visio file (for further editing)
Use the sharing features to grant access to team members or clients.
Key Benefits of Auvik for Network Topology Mapping:
- Real-time Updates: Auvik continuously monitors the network, ensuring your topology map stays current.
- Layer 2 and Layer 3 Visibility: Get detailed insights into both switching (Layer 2) and routing (Layer 3) topologies.
- Automatic Documentation: Auvik generates and maintains network documentation, including device inventories and configurations.
- Integration Capabilities: Connects with other IT management tools like PSA (Professional Services Automation) and RMM (Remote Monitoring and Management) platforms.
Method 2: Open-Source Network Mapping with Nmap and Zenmap
For organizations with budget constraints or those preferring open-source solutions, the combination of Nmap (Network Mapper) and its GUI frontend, Zenmap, offers a powerful way to discover and map network topologies.
Tools Used:
- Nmap (command-line network scanning tool)
- Zenmap (GUI for Nmap)
- A computer with network access to the target environment
Step-by-Step Guide:
Step 1: Install Nmap and Zenmap
- Visit the official Nmap website (https://nmap.org/download.html).
- Download the appropriate version for your operating system.
- Install both Nmap and Zenmap following the installation wizard.
Step 2: Configure Scan Parameters
- Launch Zenmap with administrative privileges.
- In the “Command” field, enter your basic Nmap command:
nmap -sn -O --traceroute [target network/IP range]-sn: Ping scan (disable port scan)-O: Enable OS detection--traceroute: Perform traceroute to each discovered host
- Replace
[target network/IP range]with your network (e.g., 192.168.1.0/24).
Step 3: Run the Network Scan
- Click the “Scan” button to initiate the network discovery process.
- Monitor the “Nmap Output” tab for real-time scan results.
Step 4: Analyze the Topology Map
- Once the scan is complete, switch to the “Topology” tab.
- Explore the generated network map:
- Nodes represent discovered devices
- Lines indicate network paths
- Colors denote different subnets or device types
Use the zoom and pan controls to navigate the map.
Step 5: Enhance the Map with Additional Scans
- For more detailed information, run additional scans:
nmap -sV -p- --script=broadcast [target network/IP range]-sV: Probe open ports to determine service/version info-p-: Scan all ports--script=broadcast: Run broadcast discovery scripts
Combine results from multiple scans to build a comprehensive topology.
Step 6: Export and Document
- To save the topology map, go to “Topology” > “Save Graphic.”
- Choose from available formats (PNG, SVG, etc.).
- For text-based output, use “Scan” > “Save Scan” to export detailed results.
Advantages of Nmap/Zenmap for Network Mapping:
- Cost-Effective: Free, open-source solution suitable for small to medium-sized networks.
- Highly Customizable: Extensive command-line options for tailored scans.
- Cross-Platform: Available for Windows, macOS, and Linux.
- Active and Passive Scanning: Supports both active probing and passive traffic analysis.
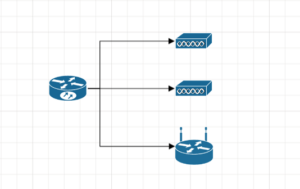
Method 3: Manual Network Diagramming with draw.io
While automated tools are efficient for large networks, manual diagramming can be preferable for smaller networks or when creating high-level logical topologies. draw.io (also known as diagrams.net) is a free, web-based diagramming tool that offers a rich set of network icons and templates.
Tools Used:
- draw.io
- Web browser
- Network documentation (IP addresses, device types, connections)
Step-by-Step Guide:
Step 1: Set Up Your Diagram
- Open draw.io in your web browser.
- Click “Create New Diagram” and select “Blank Diagram” or choose a network template.
- Set the page size and orientation in “File” > “Page Setup.”
Step 2: Add Network Devices
- Use the search bar to find network device icons (e.g., “router,” “switch,” “firewall”).
- Drag and drop icons onto the canvas to represent your network devices.
- Double-click icons to add labels (hostnames or IP addresses).
Step 3: Create Connections
- Select the “Connector” tool from the toolbar.
- Click and drag from one device to another to create a connection.
- Use different line styles to represent various connection types:
- Solid lines for Ethernet connections
- Dashed lines for wireless links
- Thick lines for high-bandwidth connections
Step 4: Add Network Details
- Use text boxes to add important information:
- VLAN assignments
- Subnet details
- WAN link speeds
- Utilize shapes like clouds to represent external networks or the internet.
- Group related devices using containers or background shapes.
Step 5: Implement Logical Layers
- Create multiple pages or layers for different aspects of your network:
- Physical topology
- Logical topology
- Security zones
- Application flow
Use the “Layers” panel to manage visibility of different elements.
Step 6: Finalize and Export
- Review your diagram for accuracy and completeness.
- Use the “Arrange” menu to align and distribute objects neatly.
- Export your diagram:
- Go to “File” > “Export as”
- Choose from formats like PNG, SVG, or PDF
- For editable backups, save as a draw.io file
Benefits of Manual Diagramming with draw.io:
- Flexibility: Create custom layouts tailored to your specific needs.
- No Software Installation: Web-based tool accessible from any device.
- Collaboration Features: Real-time editing and sharing capabilities.
- Version Control: Integrates with platforms like Google Drive for revision history.
Conclusion
Creating accurate and useful network topology maps is a critical skill for IT professionals. Whether you opt for the automated power of Auvik, the open-source flexibility of Nmap/Zenmap, or the customization of manual diagramming with draw.io, each method has its strengths depending on your network size, complexity, and documentation needs.
Key takeaways for effective network topology mapping:
- Choose the Right Tool: Consider your network size, budget, and required level of detail when selecting a mapping solution.
- Maintain Accuracy: Regularly update your network maps to reflect changes in your infrastructure.
- Layer Your Information: Combine physical, logical, and security views for comprehensive documentation.
- Standardize Nomenclature: Use consistent naming conventions and symbols across all your network diagrams.
- Integrate with Other Systems: Where possible, link your topology maps with IPAM (IP Address Management) and CMDB (Configuration Management Database) systems.
By mastering these network topology mapping techniques, you’ll be better equipped to manage, troubleshoot, and optimize your IT infrastructure. Remember that the best network map is one that’s regularly updated and easily understood by your entire IT team.