Skip to content

Starlink is proving popular, especially among those who haven’t been able to get fast and reliable internet using more conventional methods (check out the best high-speed internet near me to see if you can get connected that way).
You’ll have to set it up yourself though, which leads to the question of how to set up Starlink.
The Starlink website says it’s a matter of plugging in and pointing at the sky, but as with so many things, Starlink installation is a little more complicated than that.
At the same time, it’s easy enough that you won’t need a technician to get the job done for you.
So, you’re saying “Hey, hello, doesn’t Starlink provide all this info?”
Sure it does, but there are tons of click-throughs to get lost in, so we’ll save you hassle by giving you everything you need to know on one page. From preparation to installation, you’ll find it all here.
Use these tips to prepare yourself for your Starlink installation project and to guide you through the steps you’ll have to take.
Although it might be tempting to wait until you’ve received your hardware, you can make your life easier by taking a few simple steps before delivery.
1. Create a Starlink Account
It’s fairly logical that you have to place an order before you can create an account. Place your order on the Starlink website.
Once you’ve successfully done so, you’ll receive a confirmation email – and that email will lead you to account creation. Do remember to check your spam folders if you don’t see the mail in your primary inbox.
At the bottom of the email, you’ll find a button labeled “sign in to my account.”
You don’t have one yet, but click it anyway because it will route you to the account creation process. All you have to do is set your password, your username is automatically set as your email address.
You can use your account to track your shipment, manage your personal information, and add or cancel subscriptions.
2. Get the Starlink App
Yep, it’s another app to download, but this one is very helpful and you are going to need it. It will help you to figure out the best spot for your gear, check connectivity, call for support, and so on.
OK, so you haven’t got your hardware yet, but that app is already going to prove useful in preparing for your Starlink setup – which brings us to the next step.
3. Figure Out What Accessories You’ll Need
The basic Starlink kit you’ve ordered may not contain all the things you need to get up and running. If you wait to get your kit only to find that you need more accessories, you’re going to experience frustration.
So, if you want your Starlink setup to go smoothly and without delays, it pays to check what you’re going to need to get started.
First up, you’re only going to get a base you can use for ground setup. There are two problems with this.
Ground-based locations in your area are likely to be more subject to obstructions – things that get in the way of your ability to access Starlink satellites. And, for most people, a more permanent type of setup is likely to be preferable.
So, you’re going to need a mount, most likely, and since you’re going to look for the best spot to get satellite connectivity, the cables that come with your kit may not be long enough.
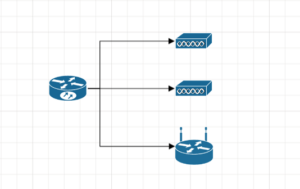
And, you need to consider whether you want to use a non-Starlink mesh WiFi system or router with your Starlink equipment – which might mean you need an ethernet adapter.
The Starlink Shop should have everything you need, and it definitely pays to check out what your extra needs are likely to be before your starter kit arrives.
So, how to know where you’re going to set up your Starlink stuff? Remember that app? You’re going to use it next.
4. Know Where You’re Going to Install Your Starlink
Nine times out of ten, you’re going to need a mount, but how much cable are you going to need? If you’re doing a static home installation, you can plan ahead.
You’ll need two things: your Starlink app and (most likely) a good, old-fashioned ladder.
Start at whatever spot you thought you might like to mount your Starlink, get into position, and use your app to check for obstructions. Just check out the menus, you should find the tool easily enough.
Remember, your app is “seeing” from the perspective of the installation site, so if you’re planning a roof-high mount, that’s where you (and your phone) need to be.
You can limit the amount of clambering you’ll have to do by looking at the location of trees and other buildings first.
They’re obstructions, and you want the area with the least amount of obstruction.
As you check, your app shows you the compass directions where it has unobstructed views and where it doesn’t. Pan your phone around, and take screenshots if you want to go back and compare locations.
Found what looks like a good spot? Ordered your mounts and cables? Now you can chill out and wait for Starlink to deliver the goods.
5. Starlink Delivered? You’re Ready to Go
At this point, things really do move to plug and play – supposing you already chose a good location for your Starlink.
Plug in the mast making sure that the plug has gone all the way in without forcing. It should sit flush with the rest of the assembly.
Once again, use your app. It walks you through the setup.
Next up, connect your Starlink Router – even if you’re planning to use a 3rd party router later. Once everything is plugged in, Starlink starts aligning itself and searching for satellites to make a connection.
This takes a little time, but while it’s working on it, you can stay productive by setting up your network.
6. What About Cable Routing? Beyond Plug and Play
Let’s take a step back. If you’re looking at a permanent installation, you might need to route some cables before you can either plug in or play.
It’s one of those, “Yeah it can be easier, but in real life, it probably isn’t” situations.
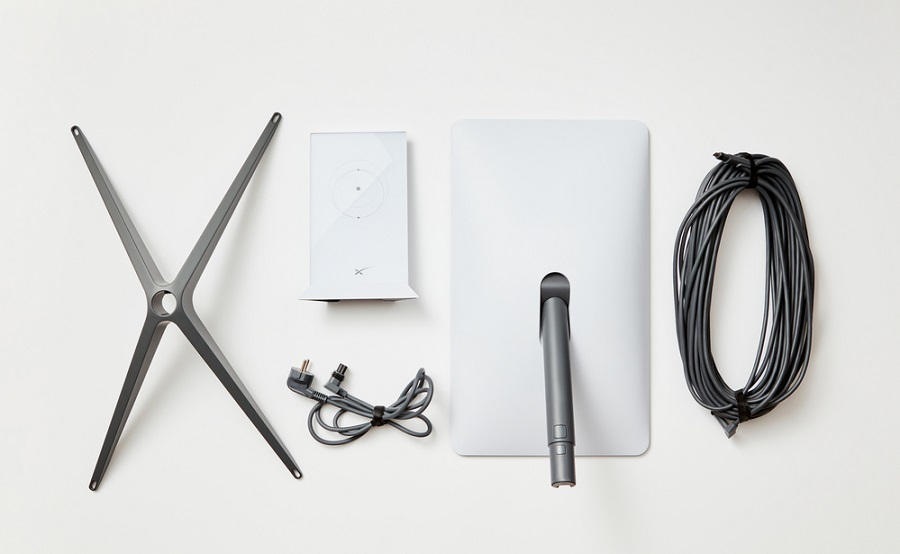
As advertised, your kit comes with a 6 ft power cable and a 75 ft ethernet cable. Need more? If you did your homework before you took delivery, you may already have what you need. Now, you need to connect the Starlink to the power and to its router.
You need to work it from outdoors to indoors without any sharp bends or constrictions. That may mean making a hole for cables to go through. 3.4” is a safe size.
If you’re not generally a DIYer, you might want a cable routing kit that includes the necessary drill bits, sealants, clips, grommets, and a cable routing tool. Going through masonry? Be sure you have the right kit and expect a slightly more technical job.
7. Configure Your Starlink WiFi
Time for that setup! Get close to your router, access your Starlink app, and choose “Start Setup.”
We don’t need to give you a step-by-step for this since the app walks you through the entire process. It’s the bog-standard stuff: choosing a network name and password, for example.
Once you have a connection, or think you do, try a bit of navigating or do a speed test. By the way, the app should tell you you’re connected. Just check the app’s main screen to verify this.
Using 3rd party devices like your beloved mesh system? Needless to say, it’s easier to set up a mesh system with Starlink’s hardware.
But if you have an ethernet adapter and are ready to go, you can move to your preferred hardware now. You’ll need to activate Bypass Mode in the Starlink App. Search for it under “Settings.”
Bypass mode is going to disable your Starlink router altogether, but you can reverse it by doing a factory reset. Not sure how?
We’ve covered factory resets for all Starlink routers in our Starlink router troubleshooting article.
A word of caution, however: not all the app features are going to work once you’ve switched to a 3rd party router.
8. Setting Up Starlink Mesh
Assuming you decided to extend your Starlink router’s range by setting up a mesh system, you’ll have several sub-routers or nodes to install.
To begin, spread your nodes as evenly as you can throughout your home. Then use the app to check what you can expect from their performance.
Each node must have a good connection with the primary router, so a central location for the main Starlink router is a big help.
9. Test Your Starlink Connection
Assuming that you found a spot with few or no obstructions before getting started, and you’ve successfully configured your network, you can move to checking your WiFi range.
But don’t be in too much of a hurry. It can take about 20 minutes for your Starlink to connect, even if it is in a relatively obstruction-free area. Once you’re connected, you can check your WiFi signal.
Remember, the location of your router is important to your Starlink installation too, and you might want to adjust that to get the widest possible WiFi coverage you can achieve.
It’s another use for your app, so put it to work. Go to the Network screen to see the strength of the connection your various devices are achieving.
The range tool helps you to see where your WiFi signal is going and you can use the same tool to check connection speeds.
You’ll find a lot of info under the “statistics” section of the app. You can also get info by entering “dishy.Starlink.com” into your browser.
10. Stuck? Starlink Support Tips
If all goes well, our Starlink Setup Guide (you won’t believe how many tabs I had to navigate on Starlink’s website to get this together) should see you up and running. But what if it didn’t go according to plan?
At times when tech just won’t cooperate, we turn to Starlink customer service. There’s good news and bad news here.
If you have the app – which you really should – opening a support ticket is as easy as clicking thumbs down on any section that causes you to get stuck. That’s the good news.
The bad news is that Starlink has a patchy support record. In the past, there were complaints that people waited for weeks to get responses.
It seems to be better now, and Starlink is talking about faster support response times, but it may be best to expect delays.
Will you get better results if you call them? Not necessarily. They’re pretty much geared to app-based support.
They motivate this by saying that an app-based request provides them with technical info that helps them to understand your issue better.
That’s fair enough. But as recently as June 2023, Reddit users were reporting response times ranging from under an hour to ten days without a response.
There don’t seem to be any hacks to get faster support responses, so you basically have to hope for the best.
Our advice is to restart the setup from scratch and run the whole process again to see if you have better luck. If all else fails, submit that ticket and be happy if you get a rapid response.
It may involve hardware replacements, so factor in delivery times before your Starlink can get up and running. Hey, it may be worth the wait, so hang in there!
There You Go! What Starlink Tells You (And What it Won’t) All in One
Starlink’s promise is to plug and play, and we can’t dispute that under the right circumstances, that may be the case.
That assumes a ground-mounted Starlink with unobstructed views of the skies and nothing much more. For most of us, Starlink setup involves a LOT more, so don’t get your expectations up too high.
At the same time, you might get better and faster internet through Starlink, especially if you’re in an underserved area or one where you wouldn’t otherwise be able to connect.
So there you have it! How to set up Starlink without the commercial fluff: We hope it all worked out well for you!